The Cleaning Mold Guide
The Cleaning Mold Guide
DISCLAIMER: The content here is for informational purposes only and should not replace professional medical advice or treatment. Always consult a healthcare professional for any health concerns. Do not disregard professional advice based on the information on this site.
AFFILIATE LINKS: In the article below, we may earn a small commission if you purchase any of the products through our links. This has zero affect on which products we have included as we only list products that we stand behind and would, without hesitation, recommend to friends & family.
Table of Contents
- Mold In Your House
- What Kills Mold: Fact or Fiction
- Mold Control Products
- Cleaning Mold
- Mold on Walls & Ceilings
- Mold on Baseboards & Crown Molding
- Mold on Floors
- Mold on Furniture
- Mold on Clothes, Towels & Bedding
- Mold in Drains
- Mold in Cars
- Mold in Air Ducts & HVAC Systems
- Mold in Electronics
- Preventing Mold
Mold In Your House

So, you’ve found some unidentified mold growing around your home and you’re panicking. The tendency to freak out and throw away everything that you think it might have come in contact with is understandable. However, just because it’s understandable does not mean that it’s the right thing to do. More often than not, you can clean up the musty offender and return what you thought it had ruined back into regular rotation in your life.
That being said, there is a right way and a wrong way to rid yourself of that mold.
How easy it would be if there were just one all-encompassing method of disposing of that moldy invader. Unfortunately, that is not the case. Removing the mold around your HVAC vents is something entirely different from removing it in your automobile. Even if it’s the same strain of mold.
Fret not. Because what you have here is the guide that will help you navigate these moldy waters. Pun entirely intended. This guide will debunk the mysteries and the myths surrounding the products designed to kill the different molds growing on, in, and near the different surfaces around your home. So much of what you find on the information superhighway is questionable at best. At worst, some of it is downright dangerous.
Hold on a second. Everything on the internet is not based on fact?
Alas, no it is not. That’s why you have this guide. Because here we have taken the time to do the research and speak to experts on the subject to pinpoint what works and what doesn’t. We’re going to cover an array of different products and chemicals that are commonly used to kill mold. We will discuss each product at length and get down to brass tacks with each one: Is it or is it not an effective way to kill this moldy menace? Some answers might surprise you.
Once we have covered each product’s viability, we’ll dive into the process of safely killing the mold found in different places in and around your home. There are myriad personal accounts out there from people who experienced a litany of terrible issues because they didn’t take care of this moldy marauder the right way. The last thing you want to do is send these mold spores flying all around your home and contaminating the ones you love. We don’t want you to hurt yourself by coming in contact with some of these cleaning products either. To ensure that nothing happens to you or your loved ones, you have this comprehensive guide. Here you’ll find detailed information about safely treating mold found living inside your home. We cannot let the last bastion of your serenity fall prey to an odorous organism.
So let’s dive right in before that funky fungus spreads.
What Kills Mold: Fact or Fiction

There is an assortment of different products, chemicals, and solutions that claim to kill mold. Here, you’ll find the usual suspects. You’ll also find some you may not have considered. Either way, you’ll probably be surprised by a lot of the information here. Also, with these products, the only thing we’re covering in this section is their efficacy in killing mold. We’ll cover the safe removal of mold in the next section.
Does Bleach Kill Mold?
The ever-dependable chlorine bleach. How often does this chemical star in the leading role of your different cleaning conundrums? You might venture so far as to say that bleach was your “old faithful”. Steady. Dependable.
Would it surprise you to learn that bleach is only somewhat effective in killing mold? It’s important to remember that mold consists of the branching, colorless filaments called hyphae that grow collectively to form the mycelium. The mycelium forms the root system of mold and is invisible to the naked eye. The mycelium precedes the growth that we commonly associate with mold: the visible spores. Molds reproduce through spores that form on the external surfaces of the hyphae.
This is important because the mold’s roots, or mycelium, grow in a manner not unlike the roots of plants. That is, they try to grow deeper into the substrate. There are some surfaces where they cannot grow deeper and further establish themselves. On these non-porous surfaces, bleach is an effective choice for killing all types of mold because the entire organism rests on the surface.
Non-porous surfaces include:
- Hard Plastic
- Metal
- Glass
- Sealed Tiles
- Leather
- Varnished Wood
- Door Handles
Keep in mind that continued use of bleach on certain products, specifically varnished woods, will compromise the structural integrity of the surface. Bleach is caustic enough to remove the varnish on wood and expose the natural, porous wood surface. Some hard plastics can be broken down from over-exposure to bleach. This is something you’ll need to consider before treating a surface with bleach.
Also, you cannot rinse the bleach from the surface. You must let it dry to ensure that the entire organism is eliminated. This means that you’ll have to deal with your house smelling like bleach. And bleach has a scent that tends to linger.
On porous surfaces, however, bleach is not effective in killing mold. When bleach is used on porous surfaces, it will only kill the mold on the surface of the medium. The roots have grown into the pores of the surface and are not affected by the bleach. In short order, the mycelium will replace the spores that you killed with new growth that could be more resilient.
You’ll be fighting the same battle over and over again. Truth be told, using bleach on porous surfaces can actually exacerbate your mold problem.
After bleach makes contact with the cleaning surface, chlorine evaporates and leaves water behind. The water will collect in the static spaces in the porous material and create an environment perfect for mold growth. Instead of getting rid of your mold problem, you have supplemented its growth and potentially made the problem worse.
Porous surfaces include:
- Untreated Wood
- Fabric
- Ceiling Tiles
- Granite
- Laminate
- Unsealed Tiles
- Certain Plastics
- Drywall
- Carpet
- Wallpaper
You should always use bleach with caution. Be sure that you wear the proper protective equipment so that your skin doesn’t come into contact with it. Also, any location where you’re using bleach should be ventilated to the outdoors. The fumes can be harmful if you are in an unventilated space for an extended period.
Taking all of that into account, the EPA does not recommend using bleach to kill mold in households and OSHA classifies it as a Category 1 Hazardous Material that can cause severe skin and eye burns and damage. As such, OSHA requires stringent PPE protection any time it is used in the form of masks or respirators, goggles, and covering for any exposed skin. The potential for harm is just too great with bleach. The EPA retracted its stance on using bleach to kill mold in homes and stated that "a background level of mold spores will remain" after applying bleach. There have been studies that show that the combination of bleach and the mycotoxins it sets out to kill combine with volatile organic compounds in the air. This combination forms pathogens that are harmful to human beings and other forms of life.
Combining the stance taken by the EPA, OSHA, and the CDC with bleach’s limited mold killing capability and potential dangers should leave you with one conclusion: leave it under the sink.
Does Ammonia Kill Mold?
Ammonia is one of the most commonly produced industrial chemicals in the country. It is also produced naturally in the human body and the environment. It is produced as a byproduct of the waste of humans, plants, and other animals. It is also found in the soil as a byproduct of bacterial processes.
As a cleaning product, some consider it second to none. Insofar as its ability to kill mold, it is only effective on non-porous surfaces. Mold is a living organism, to preserve its life it will grow deeper into the static spaces of porous surfaces to avoid the chemical trying to kill it. This can cause the mold to come back stronger than it was before. Deeper roots make for a stronger organism.
That being said, ammonia not only kills mold spores but also destroys the molecular structure of dangerous mycotoxins (chemicals dangerous to human beings and other forms of life). It is apparently the only naturally occurring substance that we know of that accomplishes this.
It has been proven that commercial food products treated with ammonia to destroy mycotoxins are not harmful to human beings that consume them.
In short, when it comes to killing mold on non-porous surfaces, you can’t do much better than ammonia.
Commercially produced industrial-strength ammonia is an alkaline substance and is corrosive. This corrosion extends to the surfaces that it treats. So be mindful of the surfaces that you use ammonia to treat. Ammonia will corrode wood varnishes, it will remove paint, and it can compromise the structural integrity of plastics.
Never combine ammonia with bleach as it will form chloramine gas. Chloramine gas was used in World War I in some of the earliest chemical weapons. Exposure to significant amounts of chloramine gas can cause:
- Chest Pain
- Severe Breathing Problems
- Fluid in the Lungs
- Pneumonia
- Severe Vomiting
- Death
So, if you’re thinking that combining these two amazing cleaning products will double up on your cleaning prowess, think again. Please do not mix ammonia and bleach.
Be mindful that when ammonia is combined with water, the result is an alkali (pH level > 7.0) ammonium hydroxide. It’s also important to take care to not get any ammonia on your skin because you could be sweating. If your sweat mixes with the ammonia on your skin, you could experience a chemical burn. It’s not likely, but it’s something that you should keep in mind.
Does Vinegar Kill Mold?
Were you beginning to think that you were never going to use that old bottle of white vinegar hiding out in your pantry for the last year or so? If so, I’ve got some good news for you. You can use it to fix your mold problem. In some ways, it’s even better than ammonia.
First, I should clarify that we’re talking about good, old-fashioned distilled white vinegar. Keep the apple cider and balsamic varieties in the pantry.
Distilled white vinegar will kill 82% of the documented mold types. It contains between 5% and 10% acetic acid and has a pH level of around 2.5. You can also use what’s marketed as “cleaning vinegar” to the same end.
Vinegar has the advantage of being effective on both porous and non-porous surfaces. Another advantage is that the scent of vinegar is not terribly unpleasant and it dissipates quickly. If you’re using ammonia or bleach, your house is going to smell like cat pee or a swimming pool after it has just been treated with chlorine and other chemicals or “shocked.” And that smell will last a while.
You’ll need to let the vinegar sit for an hour to effectively treat your mold problem. Spray the area with vinegar and walk away. Doesn’t get much simpler than that. It should be noted that vinegar will not kill mycotoxins. So, if you’re concerned that your mold produces harmful mycotoxins, choose another substance.
Vinegar can be used on just about anything. However, the acetic acid in vinegar can compromise surfaces like natural stone, cast iron, aluminum, and waxed wood. It will also damage the anti-glare capabilities of computer monitors and television screens.
Does Baking Soda Kill Mold?
You can use a baking soda solution to effectively clean mold from a surface. It’s best used when mixed with vinegar. Baking soda alone will not effectively kill the mold or its mycotoxins. Baking soda is a natural disinfectant with a very mild smell. So it can be used to clean up the mess that mold tends to make. You can mix it with vinegar to gain some added punch to the mix. The solution is great for treating the stains that molds leave behind.
Begin by spraying the solution on the area and give it some time to rest. Come back 15 minutes later and scrub with a damp cloth or sponge to remove the mold.
While baking soda does a fantastic job of cleaning up the mess mold leaves behind, that’s the only thing that it’s good for when it comes to treating mold.
Does Hydrogen Peroxide Kill Mold?
We use hydrogen peroxide to treat open wounds. So, it inherently must have some anti-microbial properties. A study in 2013 showed that hydrogen peroxide does have some properties that inhibit fungal growth on solid surfaces.
However, inhibiting is not the same as killing. The same study showed that hydrogen peroxide is ineffective at killing mold on porous surfaces.
The conclusion is that hydrogen peroxide may help prevent mold from growing. Once the mold is established, however, hydrogen peroxide is only effective in cleaning up the mold after you treat it with some other cleaning agent. It will not kill the mycelium or the mycotoxins. It also has the potential to cause accidental bleaching on natural fabrics like cotton and wool.
If you’re just cleaning up the mold after you’ve killed it, hydrogen peroxide is an effective choice. Anything more than that, you’re better off choosing something different.
Tea Tree Oil for Mold
Tea tree oil is antimicrobial and antifungal. That does not mean that it kills mold. It means that it works well at preventing it from growing.
Basically, it is a wonderful disinfectant that wards off the growth of bacteria and fungi. As a stand-alone product, it is not an effective means of killing mold. It can be mixed with vinegar to supplement its properties. The vinegar and tea tree oil solution is a fantastic way to naturally kill mold. It will not kill mycotoxins though.
Another added benefit of tea tree oil is that it will mask the musty smell of mildew and mold. Tea tree oil is more expensive than the other natural methods (~$15 for 2 ounces). If you’re going to spend that kind of money because you want to keep things green, just go with the Benefect Botanical line of products.
Mold Control Products

What you have read above are some of the household items that you can use to treat a mold infestation. While there is nothing wrong with the "mom & pop" style cleaning of grabbing what’s available (granted, sometimes that's the best choice when it comes to mold...you just want it out of wherever you found it fast). That being said, there's a reason that so many of those aforementioned products are so utilitarian and can be used for so many different purposes. Consider it, Baking soda can be used for things like deodorizing your drawers, sanitizing your hairbrush, and even brushing your teeth. Vinegar has a repertoire that includes killing weeds, killing insects, and defrosting car windows.
Do you see what I'm getting at? There's nothing wrong with being a jack of all trades. Right up until you realize that you're the master of none. Unfortunately, sometimes you gotta be the master. Mold is no exception. Sometimes it takes more than what you've got tucked away in the kitchen cabinet or the laundry room.
There's an entire section of the cleaning product industry that is dedicated to capturing, killing, combating, and cleaning mold and the damage it brings with it. However, not all products are created equal. Sometimes one mold killer works better than another on a particular surface. Then when you put the same two products onto a different surface, the inferior product from the first surface outperforms the other product.
Given the amount of products dedicated to the eradication of mold coupled with their varying capabilities on different surfaces, it would take you an egregious amount of time and money to figure out which product works best on each surface. Not to fear. We've taken the reins on this one and done the proverbial dirty work. We've taken these products and put them through their paces on different surfaces and in different conditions.
The result is this list of the best mold control cleaners, disinfectants, and decontaminants. The list that you are about to read begins with the best overall product and works its way down to products that didn't measure up for one reason or another. In this list we have considered the following criteria:
- Porous and Non-Porous Surfaces
- How Effective is the Product at Killing Mold?
- Does the Product Kill the Entire Mold Organism and its Mycotoxins?
- How Effective is the Product at Cleaning Discolorations and Staining Caused by Mold
- How Does the Product Work?
- What Does the Product Actually Do?
- Delivery Mechanism
- How Hazardous are the Chemicals in the Product?
- Is the Product Harmful to People or the Environment?
- What Kind of Molds Does the Product Treat?
Our recommendations are made by taking all of these factors and any other pertinent information into consideration and rate the product for how it performs overall. This list takes into account everything the product is able to do without focusing on one specific aspect.
Which leads me into this. There is a section that proceeds this list that is dedicated to the process of cleaning mold off of specific surfaces, objects, and areas. Since the effectiveness of these products can be different from one surface to another, we have gone ahead and provided you with our recommendations for each individual surface, object, or area at the end of its section. Those recommendations will vary from the list in this section as we are only considering how effective a product is on a particular medium.
So, without further adieu’, let's get started.
#1. Micro Balance EC3 Mold Solution Concentrate

When it comes to mold control products, the EC3 is second to none. There are so many amazing things about not only the Mold Solution Concentrate but the whole line of different products they produce. One thing that immediately sets it apart is how the whole EC3 line came to be. The EC3 line was designed by Doctor Don Dennis, Board Certified Ear, Nose, and Throat Specialist, as part of the Environmental Treatment Protocol for those suffering from sinusitis or other mold related health issues. The entire purpose of these products is to ensure that the people living in the environment that they are used in, won't suffer from the problems associated with mold infestation.
With EC3, it's not just about the cleaning and removing of the mold, it's about a safe and effective experience for those who use it. This is different from other product lines in that their mission, from the outset, is removing and cleaning the mold. Certainly, there are considerations for the people that use the products, but they focus on getting the mold out of the house and that’s about it. Get the mold out and their job is done. They don't consider what happens to the people after all is said and done. With EC3, their focus from the beginning was on what happens to these people when all is said and done. That focus sets them apart.
With the Mold Solution Concentrate, they have created a non-toxic, non-irritant product that controls mold with citrus seed extract that is shown to weaken mitochondrial membranes of bacteria and fungi which is one way it causes the organisms to die. The extract also stops mycotoxin biosynthesis. When biosynthesis is halted, molds become inert and less of a health concern. It can be delivered in the form of a spray, a mist, or used in a fogger. It is a concentrate, so you will have to dilute it in water before you use it. It is safe for use on all materials and effectively treats mold infestations on porous and non-porous surfaces. I'll say that again, it can be used on any surface to treat mold infestation.
The efficacy of the citrus extract used in the Mold Solution Concentrate has shown that when the mold is exposed to low concentrations of the extract it resulted in changes in the cell structure of the mold, inhibited its respiration, and changed the permeability of the cell membrane. When mold was exposed to high concentrations of the extract it led to severe damage to the membrane, loss of homeostasis, and, finally, the death of the cell. The active components of the Mold Solution Concentrate caused the loss of the integrity of the cell wall and, thus, the loss of cytoplasmic constituents (proteins, vitamins, amino acids, and more) from the mold’s hyphae. When hyphae are damaged, mold cannot take root, spread, or reproduce.
All of that from a product that is 100% natural. The ingredients are simple and pure: distilled water, tangerine oil, tea tree oil, and citrus seed extract. It works on contact and is safe to use on everything. Even fabrics and leather. The only problem that I can see is that there is a possibility it could leave water stains on unfinished wood furniture. However, the solution to that problem is to lightly mist the furniture and wipe it off within one minute.
Another interesting thing about the EC3 brand of products is everything that they have is used in the eradication, cleaning, disinfecting, or removing mold and mycotoxins. The EC3 line includes:
- Mold Solution Concentrate
- Laundry Additive
- Mold Solution Spray
- Air Purification Candles
- Citridrops Nasal Spray
I stop short of saying anything is perfect, but the Mold Solution Concentrate is about as close as you can get. There are reports of people using it on their dogs whenever they come in from the outdoors with no ill effects. You can put this product, in the correct concentration, onto a paper or dish towel and wipe down your vegetables. It is effective. It is environmentally friendly. It works on any surface or material. And it's all natural. That's why the EC3 Mold Solution Concentrate lands in the number 1 spot.
#2. Benefect Botanical Decon 30
#3. Benefect Botanical Disinfectant


These are both products sold by Benefect Botanical that are a fantastic natural alternative to killing mold. If you're curious as to why the list began with two recommendations over one section, it's because these two products are made by the same company, they are numbers 2 and 3 on the list, respectively, and they are nearly identical when it comes to chemical makeup and capability except for one key factor. That factor, as you probably inferred, is the reason that the Decon 30 is ranked above the Disinfectant. That single, formidable difference is that....drum roll please... Decon 30 will kill mycotoxins and the Disinfectant will not.
What are mycotoxins and why do they matter, you might ask.
Mycotoxins are secondary metabolites of fungal activity. They are not a part of the mold itself and can survive after it has been removed. Therefore, mycotoxins will require another form of treatment if the product used does not treat mycotoxins. For that reason alone, stick with the Decon 30 and not the Botanical Disinfectant. 360 species of mold produce mycotoxins, it's best to err on the side of caution and use the product that will take care of these metabolites as well as the mold organism itself.
Both Benefect Botanical Disinfectant and Benefect Decon 30 utilize botanical thyme oil to treat mold infestations. The thymol, the derivative of the botanical thyme oil, kills 99.9% of molds, mildews, and bacteria within 30 seconds of contact with the surface.
Benefect Botanical Decon 30 is registered with the EPA as a verified mildew-stat and fungicide. The Food and Drug Administration categorized its ingredients as "Generally Recognized as Safe" (GRAS) and as a Direct Food Additive. It meets or exceeds the government’s stringent germ-killing requirements for hospitals and institutions as well.
It is a natural product that will not require ventilation of the area and has no harmful chemicals, dyes, or health warnings associated with its use. It is safe for contact with skin and food surfaces. Both Benefect Botanical products treat porous and non-porous surfaces effectively.
Another added benefit is after the mold has been killed and removed, another application of the product will create an effective surfactant system that prevents new mold and mildew growth on the treated surface.
If you’re going to choose the natural route, you can’t go wrong with either of these products. Choose the Benefect Botanical Decon 30 if you’re unsure if your mold releases mycotoxins. If you’re 100% certain that no mycotoxins will be secreted, either product will do the job.
Neither product requires dilution and comes ready-to-use. They can be used in foggers as well as the normal spray and wipe method. Both have an extended shelf life as well. The only real complaint about these products is that they have an odd smell. Not a bad smell, just an odd one that lasts a day or so.
Given all of the benefits these products offer, an odd smell seems like a small concession to make.
#4. Concrobium Mold Control

Concrobium’s Mold Control is available as an aerosol, a spray bottle, a large jug, and as a water hose attachment for treating mold covering your deck, home, or driveway. You can also buy it as a fogger or as a dual solution designed to treat mold while simultaneously removing deep stains.
These products are effective at killing and cleaning mold on porous and non-porous surfaces. The Mold Control line is EPA registered and does not contain bleach, ammonia, volatile organic compounds, or other toxic chemicals that can be harmful to you, your loved ones, or your pets. The product is not considered hazardous per OSHA standards and shows no chemical reactivity and is completely stable under normal storage conditions.
Not only does Concrobium Mold Control eliminate molds, it also prevents them from returning. While it is a fantastic mold control product, the primary drawback is that it does not kill mycotoxins. This can be a deal-breaker because the ability to kill mycotoxins is one of those major boxes that consumers want to be able to check off when it comes to their mold control products.
The majority of commercially available mold control products are acidic with a pH level below 7.0. Concrobium Mold Control, on the other hand, is intensely alkaline with a pH level of around 11.5. Working to Concrobium's advantage, mold spores can lie dormant for some time in acidic conditions but not in alkaline. In short, it is a tri-salt polymer that crushes the mold spores and kills the roots as it dries after being sprayed.
The product continues working long after it dries and prevents mold from regrowing in the treated area for several months. Some of the surfaces it can effectively treat include:
- Drywall
- Wood
- Composite Wood
- Plastic
- Concrete
- Siding
- Shakes
- Metal
- Brick, Stone, and Tile
- Grout and Stucco
- Fabric and Upholstery
- Furniture
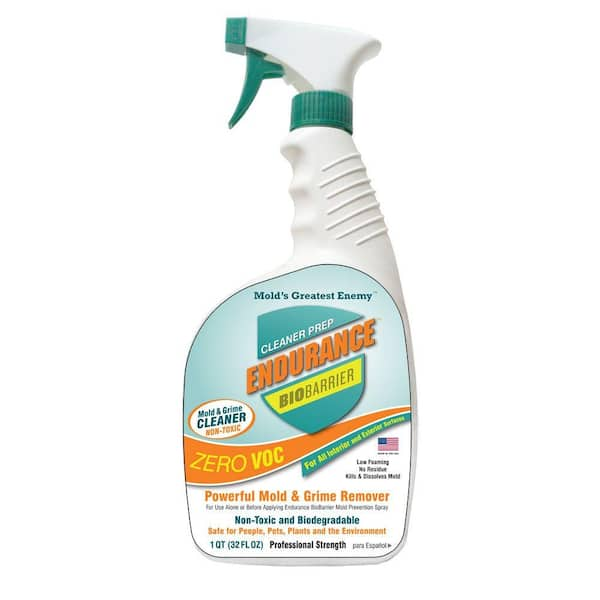
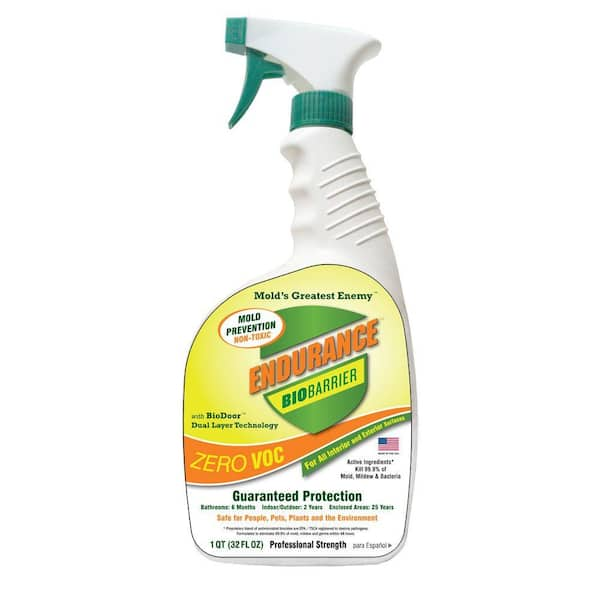
#5. Endurance BioBarrier Cleaner Prep & Endurance Biobarrier Mold Control Spray
You probably noticed that there are two products listed here. That's because they are part of a two step process that begins with removing the mold and cleaning the area in preparation for the second step. The second step is a unique spray that prevents mold from growing through some scientific ingenuity.
Endurance BioBarrier is unique in a way similar to the EC3 products from the number one spot on this list. The company is a subsidiary of Glaxo-Smith-Cline which is one of the largest pharmaceutical companies in the world. Glaxo-Smith-Cline are at the forefront of the development of new, groundbreaking medications. Needless to say, their science department is on the cutting edge. And Glaxo-Smith-Cline flexed their proverbial pharmaceutical muscle and applied some of that scientific prowess to the Endurance BioBarrier Mold Control Spray. Now, the science has to be strong because this product does make what appears to be some outrageous claims. We'll get to all that a little later in this recommendation. For now, let's talk about the first product.
The Endurance BioBarrier Cleaner Prep removed mold from all interior and exterior surfaces, porous and non-porous. It is a powerful mold remover and cleaner that is water based and contains no volatile organic compounds. The low-foaming spray is designed to remove mold, mildew, and surface contaminants without leaving any sticky residue behind. The spray is odorless and does a better job than a number of other products at loosening mold from where it's anchored. The ingredients, well, that's a bit of a conundrum. Glaxo-Smith-Cline must have also flexed its muscle with the US Patent Office because the ingredients are proprietary and not made available to the general public. They've just made it known that it's non-toxic and safe for use around people, plants, and animals. And there's another downside that bears mentioning. The Cleaner Prep does not kill mycotoxins. Now, here is where it gets interesting. The Endurance BioBarrier Mold Control Spray is truly a unique product. Its active ingredients, which shall remain nameless, are registered with the EPA and the Toxic Substances Control Act (TSCA) as being able to destroy pathogens and are formulated to eliminate mold, mildew, and other contaminants within 48 hours. The manner in which the Mold Control Spray eliminates molds is a three-pronged attack that doesn't give them much of a chance. The spray will attack the mold at a cellular level by doing the following:
- Disrupting the cell's food cycle, causing it to starve and die.
- Disruption of the cell's DNA and preventing it from reproducing
- Puncturing the cell's wall, causing it to rupture and die
The Mold Control Spray works by applying a water-based coating to the area you are treating. Now, it's once the product finds its landing spot that the science comes out in full force. Upon application, a high-tech polymer microscopically binds a proprietary blend (yeah, they aren't giving up those ingredients) of biocides and fungicides to the intended surface. This binding prevents the all-important active ingredients from being washed away easily. When moisture is present on the treated surface the polymer biobarrier is designed to open to allow the active ingredients to attack the mold, mildew, and other contaminants that might be present. If you are a little perplexed as to how a polymer biobarrier opens, you're not alone. I was confused when I first encountered the verbiage. So, I dug a little deeper and found that if you picture a mesh screen laid over the treated surface it gets a little easier to understand. What happens when moisture appears in that area is the open areas within the mesh expand and the active ingredients, that have been resting on the polymer barrier unable to fit through, can now make their way through the open spaces and down to where the mold and mildew are trying to set up shop. This rationing of the active ingredients allows Endurance Biobarrier to remain effective much longer than other products.
This scientific mold remediation technology is called Biodoor Dual Layer Technology and is patented. The science caught the eye of the United States Army and they have done and are doing extensive testing to evaluate the specification of Endurance BioBarrier for the treatment of the fabrics used in military applications (uniforms, tents, parachutes, equipment, etc...). The Mold Control Spray is effective in killing 32 different species of mold including Aspergillus niger or black mold. This number is impressive considering the fact that there are only about 14 different species of mold that are commonly found in homes.
There have been several case studies done to confirm the product's ability to do what it claims to do. One case study involved a homeowner that removed all of the mold and algae off of the north facing wall of his home. He treated the bottom right-hand corner with Endurance BioBarrier Mold Control Spray. Fast forward 20 months and the treated section of vinyl siding was mold and algae free while the rest of the north wall was covered in the stuff.
A second case study was conducted by treating a latex paint swatch with the Mold Control Spray and placing it into a petri dish full of gelatin and inoculating that gelatin with mold spores. The gelatin acted as the food source for the spores so they had an ideal environment to thrive. When the facilitators returned 3 weeks later, they found that the swatch had absolutely no mold on it. In fact, the mold had formed a circle against the wall of the petri dish in what could only be interpreted as an effort to get as far away from the swatch as possible. A second test that was identical to the first one was performed with one key variable: the treated swatch had been placed under running water for 24 hours prior to insertion into the petri dish. When the facilitators returned 3 weeks later, they discovered results that were nearly identical to the first test. This proved the product's ability to withstand exposure to large amounts of moisture without losing its effectiveness.
Now, Endurance BioBarrier has made the following claims about its Mold Control Spray:
- On high traffic surfaces in kitchens and bathrooms, one application of the product will prevent mold for 6 months
- On exposed indoor and outdoor surfaces such as walls, ceilings, window frames, eaves, gutters, and siding, one application will prevent mold for 2 years
- On enclosed spaces such as attics, crawl spaces, and stud cavities, one application of the product will prevent mold for...drumroll...25 years
Now, the first two claims have been supported on many occasions through trials, studies, and testimonials. As far as the claim for the attics, crawl spaces, and stud cavities, I can't say for certain. Honestly, I'm not too sure how the company can either because they've only been in business since 2009. Maybe Glaxo-Smith-Cline has a time machine too.
Cleaning Mold

How wonderful it would be if mold was simple. A one size fits all kind of fungus that doesn’t complicate things. It wouldn’t need different chemicals for different surfaces. It wouldn’t matter if the substrate were porous or non-porous. But no. Even though mold is nothing more than a simple fungal organism, it sure has a way of making things extremely complex.
We’ve already debunked the myths and confirmed the facts about the products that we use to kill and clean up the mold. Even that was more complicated than you probably imagined it to be. The different surfaces, objects, and areas that mold finds a way to make itself at home on, in, or around are no different. There are things that you certainly need to know about these potentially inconspicuous spots for mold to shack up in your home. The difference is that, in these spots that aren't immediately obvious, you’re the one that has to pay for the mold to stay in your humble abode.
That’s what this section covers. The ins and outs of cleaning up mold growing in some of the more common places around your home. At the end of each section, you will find our recommendations as to what mold control product(s) work the best for the given item. There are literally thousands of different mold control products that treat mold on every surface imaginable. So, we created the list above based on overall performance across different variables like price, does it clean porous and non-porous surfaces, toxicity, its ability to kill mycotoxins, and things of the like.
After each section about a particular surface, object, or area you will find our product recommendations. There may be certain products that work amazingly well on the item or area in question that are not on the preceding list. We went ahead and prescribed the best product for the job, but it did not perform well enough in all or some of the other areas that we used to determine which products went onto the list of the best all around mold control products. We felt it prudent to mention this to avoid any confusion.
Mold on Walls & Ceilings

Both of these surfaces are porous. So, it’s essential that you not only treat the spores that cause the discoloration and stains that you see without a microscope. You’ll also have to take care of the mycelium membrane that lurks beneath the spores and is invisible to the naked eye.
It’s this mycelium membrane that poses the biggest threat.
The mycelium takes advantage of the flaws in porous surfaces. These empty pores provide the mycelium with the perfect opportunity to extend its root system deeper into the surface. This strengthens the mold and makes its root system more complex.
More complex = more difficult to kill.
When addressing mold problems on walls or ceilings, choose a cleaning agent that works on porous surfaces to kill the mycelium found in those pores. Otherwise, you’ll be repeating this process over and over again until you finally wise up and decide to use the right cleaning agent that is effective within the surface. Not just on top of it.
Before you do anything, ventilate the contaminated area outside your home. Even if you’re using a cleaning agent that doesn’t require it, it’s still a good idea to go ahead and ventilate the area. Sometimes these control products have an odd smell and the ventilation will speed up the dissipation of the odor.
Besides, you never know how you’ll react to the fumes of a cleaning agent. Even ones that don’t require ventilation. It’s always best to side with caution and ensure that you come out with a clean bill of health on the other side.
After you have ventilated the area, gather your Endurance Biobarrier Clean Prep and Mold Prevention Spray. Spray the affected areas of the wall and ceiling along with nearby areas that do not appear to be contaminated. Just because you can’t see mold growing doesn’t mean that it’s not there.
Once you have sprayed the contaminated areas, wait until the product effectively permeates the surface. The time required for these different substances to take effect will vary between them. Refer to the instructions on the package for commercial products.
Clean the treated areas with a soft-bristled scrub brush. You may have to repeat this process several times to completely remove all the stains and discoloration.
Once you feel comfortable that you have taken care of the mycelium by following the instructions on the product, focus on whatever discoloring was left behind on the surface.
A baking soda solution is an excellent natural option for cleaning any stains or discoloration. Baking soda exhibits excellent cleaning capability and is only mildly abrasive. This is perfect for the easily damaged surfaces of walls and ceilings.
Our product recommendation for mold on walls & ceilings is...
Endurance BioBarrier Clean Prep & Mold Prevention Spray
For treating mold on walls and ceilings we recommend the two step remediation products by Endurance BioBarrier. Studies have proven that mold will not return for 2 years following a single round of treatment with these products. The water-based spray is a mist that won't leave a waterlogged area on the walls or ceiling and the product is well-equipped to handle that oh-so porous surface without a problem. Also, that 2 years is a guarantee. So, if for some reason the mold returns before that point, you get your money back. (And hopefully an apology to come with it).
Mold on Baseboards & Crown Molding

More often than not, you’re going to run into baseboards when cleaning mold off of walls. And there’s a reasonable chance that you’ll come across crown molding too. These wooden surfaces can be porous and non-porous. It all depends on whether the wood has been treated with a varnish for protection or aesthetic value.
Either way, use the same substance you used to clean the walls or ceiling. You’ll do essentially the same thing that you did on the walls. Spray it onto the baseboard or crown and allow it to sit so it has time to do its job. Scrub the treated area with a scrub brush and repeat as necessary to deal with any stains or discoloration that remains.
The last step is where we change it up a bit. Wood is considerably more dense than drywall. As such, it takes more time for the cleaning agent to penetrate the static spaces in the wood. Once you have cleaned the surfaces to your satisfaction, spray an additional layer of your cleaning agent onto the clean surfaces and walk away. Allow the final application of your cleaning solution to air dry on the surface without interference.
Allowing the cleaning agent to rest undisturbed until it dries gives it time to soak deep enough into the dense wood to reach any mycelium left behind within the porous surface. It also provides an additional layer of protection for the baseboard or crown. There is a good chance that when you were cleaning the area you caused some of the mold spores to take flight. If they come to rest on the baseboard or crown, they don’t stand a chance because of that final application of cleaner.
You shouldn’t apply the additional layer to the drywall or ceiling. You risk saturating the material and leaving visible wet spots as well as compromising its structural integrity.
Our product recommendation for mold on baseboards & crown molding is...
Benefect Botanical Decon 30
Benefect Botanical Decon 30 can be used on the porous surfaces of baseboards and crown molding. One round of treatment will eliminate not only the mold growing above and below the surface of the wood but also those dangerous mycotoxins that might be hanging around. Give the baseboards or crown molding a second round of treatment with the Decon 30 and you will have created a surfactant that will prevent new mold or mildew from growing there.
Mold On Floors

Let’s break down the different types of floors where mold might show up insisting that it stay a while.
Mold on Wood Floors
The problem with every kind of floor is that you’re not just dealing with the mold on the floor’s surface. You’re also dealing with mold below the floor that is more problematic because of the damage it can do. In the case of wood floors, this damage includes discoloration, wood rot, and warping.
Before you attack those subterranean spores and hyphae, always don the proper personal protective equipment (PPE). This includes non-porous gloves. Rubber kitchen gloves that cover the majority of your forearm are ideal. You’ll also need to cover your nose and mouth with an N-95 mask and your eyes with goggles or safety glasses. Any cavity that the mold spores could slip through and reach your mucous membranes should be covered. You should also choose clothes that you don’t mind losing. Depending on the extent to which your clothes are in direct contact with the mold, you may want to throw them away. But, if you're attached to your threads, one of the best laundry additives for mold removal is Micro Balance EC3 Laundry Additive. It's all natural and effective at cleaning away mold spores and odor causing bacteria. If you're going to try and save the clothes, that's the additive we recommend using.
First things first, locate the source of the moisture that the mold is utilizing. Once you’ve cut off the moisture, you will likely be able to handle the mold on the surface by spraying your Benefect Botanical Decon 30 and wiping it up. Mold growing on the surface of wood floors is not difficult to remedy. The real trouble is the mold growing below the surface.
Place your chosen cleaning agent into a spray bottle and spray it on and around the mold on the surface of the wood. Allow it to rest for at least 10 minutes for maximum effectiveness. You should be able to wipe up the surface mold with a rag. For the more stubborn stains, use a scrub brush with firm bristles and apply some pressure while scrubbing. Once you’re done wiping and scrubbing, be sure to dispose of any paper towels that were used and thoroughly clean any rags that you don’t plan on throwing away.
Hopefully, you don’t have to clean any more than just the mold on the surface. But you’ve got to test the wood to be sure. Using a standard flathead screwdriver, press down on the spot where the mold was concentrated. You won't have to press the screwdriver down very hard, as soon as you apply a little bit of pressure you'll have your answer. If the wood holds firm, then you’re out of the woods and don’t have to worry about any mold growing beneath the wood’s surface.
But, if your screwdriver pushes into the wood and it offers the resistance of a damp sponge, then get ready for a long day. You’ve got mold beneath the surface of your wood floor and you’re going to have to get in there to assess the damage.
First, you need to dry out the area completely. Place a large fan (two for larger areas or quicker drying) blowing air directly across the area for several hours. This will protect your wood floors and prevent future mold growth. Also, mold that is ingrained into wood floors beneath the surface should only be removed when it is completely dry.
After you have finished drying the floors, be sure to ventilate the room properly and use the fan to assist you. Place the fan in the window facing outward so it blows air outside. Positioning your fan in this manner will help you pull the mold spores in the air towards the window and usher them outside before they have the opportunity to be inhaled and affect you physically.
On mold that has ingrained itself into the wood, use 80 to 100 grit sandpaper and sand away as much mold as you can. Switch to 220 grit sandpaper to tackle any mold that penetrated the wood more deeply.
After you have removed the mold ingrained in your wood floors, polish the affected areas with 250 grit sandpaper until you have smoothed out the surface.
If you’ve found that mold has penetrated the wood completely or close to it, it is probably not going to be salvageable. So, you’re going to have to cut your losses and remove that piece of flooring and replace it.
Use a boxcutter, screwdriver, or hammer and chisel to cut and loosen the edges of the damaged piece of flooring. Pry it up carefully so you don’t damage the surrounding pieces of undamaged wood. Once you’ve removed the damaged piece of flooring, immediately place it into a garbage bag and close the top so spores do not escape.
Before you replace the damaged flooring, thoroughly clean the subfloor beneath the wood with your chosen cleaning agent and a scrub brush. Once you have allowed the area to sufficiently dry, it’s time to replace the flooring.
When replacing wood flooring, ensure that the replacement wood fits snug on all sides and is flush with the surrounding floor. Once you have the flooring laid and set snugly in place, apply a polyurethane coating for an extra layer of protection. The varnish will prevent the mold’s mycelium from growing into the pores of the wood. Match the polyurethane to the existing floor so that it doesn’t stand out.
As an aside, if you have wood flooring that does not have a stain or varnish, it’s a good idea to spend the time and effort in applying one. It could wind up saving you thousands you would have to spend replacing the unvarnished wood floors.
Once you have finished the job, use a wet-dry shop vacuum with a HEPA filter to clean up the area and collect any dead (or living) spores that may have spread around the room while you were cleaning up. It's important to use a wet-dry shop vac because mold means moisture and a wet dry vac accounts for any residual moisture that may still be present and a HEPA filter is the only filter built to US Department of Energy standards and collects 99.97% of all particles passing through them that are 0.3 microns in size. Some standard vacuums do come equipped with HEPA filters but they are not well suited to dealing with moisture. Be sure to throw away all rags and sandpaper and thoroughly clean all of the tools that were used on the job.
Our product recommendation for mold on wood floors is...
Benefect Botanical Decon 30
Depending on how severe the mold infestation is in your wood floors, there could be damage and wood rot that is prime for toxic mold growth. Decon 30 will work on wood floors with or without a varnish and, if the damage is extensive, the likelihood of mycotoxins being present goes up. Decon 30 can handle both of those issues and then some. Not only does it take care of your mold problems, the active ingredient, thymol, kills 99.9% of all molds, mildews, and bacteria. That kind of coverage can come in handy when you wind up with a rotten wood floor that feels spongy to the touch.
Mold on Tile Floors
FYI, you can use this method if you have tile walls in your bathroom or as a kitchen backsplash.
As always, ventilate the rooms where you’re going to be cleaning and put on the appropriate personal protective equipment. Safety first, guys and gals.
While the tile may not be porous, the grout between the tiles certainly is. So, choose a cleaning agent that works on porous surfaces. Place your chosen cleaner into a bucket and use a soft-bristled brush that attaches like a mop to an extended handle. It’s best to go ahead and mop the entire floor with your mold cleaner.
Tile floors usually show up in high-traffic areas of the home. The mold that grows on these floors has likely been disturbed several times and the spores have been scattered throughout the area. The scattered spores cannot be seen by the naked eye. If you only treat the contamination you can see, you’re probably going to have to come back and do it all over again with spores that were dispersed. Instead, play it safe and bet on the notion that those spores have covered the whole floor.
Once you have finished mopping, it’s time to pretend like you’re in basic training. Imagine you’re down on your hands and knees with Forrest Gump and Bubba talking about shrimp as you scrub the tile with your toothbrush.
Pour some of your mold cleaner into a cup and grab a toothbrush with firm bristles. Dip the toothbrush into the solution and attack the grout between the tiles. Don’t be conservative with the amount of cleaner that you use. You want it to soak into every last nook and cranny of the extremely porous grout. This will ensure that the mycelium meets its match.
Repeat the process as needed until the stains are cleaned to your liking. Once you’re finished and satisfied, rinse the excess cleaning solution off of the tiles with a wet sponge. If you’re cleaning your shower or bathtub walls, you can rinse the solution by running hot water over the tiles and allowing the water to drain.
Our product recommendation for mold on tile floors is...
EC3 Mold Solution Concentrate or Spray
You really can't go wrong with EC3 on anything but wood surfaces, and that's only because it might leave water stains. When it comes to tile, you're dealing with a tile that is a non-porous surface and the grout between the tile that is about as porous as it gets. EC3 handles both types with ease. The product absolutely devastates every part of the mold organism and does so while being completely harmless to children and pets. The odds are that your kids or pets will be bounding across those tiles in the very near future, so it's best if the product they step on (or lick) will do no harm to them. Combine that with the scent of citrus extract, and it sounds like mold is in for a real bad day without forcing you to endure a real bad smell.
Mold on Carpet
Mold growing on and in your carpet can happen for a variety of reasons. You could have spilled your beer and did a pitiful job of cleaning it up because you didn’t want to miss the game. There could be a leak that you’re unaware of. You could have a puppy that thinks your living room rug is its puppy pad. Any number of things could be responsible for a wet spot on the carpet that winds up carrying mold.
Just as there are several ways for mold to wind up on or in your carpet, there are also many ways to remove it. As with all things in life, some methods are more effective than others. You’ve got natural remedies like vinegar or tea tree oil that are effective at cleaning mold but fall short when it comes to killing it.
Then you’ve got bleach that will most likely kill the mold, but it will also turn your carpet an array of whitish hues. Your best bet with carpet is probably going to be one of the Benefect Botanical products that you read about in the preceding section. Both the Disinfectant and the Decon 30 are natural products that are registered with the FDA and the EPA. They both work on porous and non-porous surfaces. We recommend the Decon 30 because it will also take care of any mycotoxins that the mold might have to offer.
Although it’s not required with the Benefect Botanical products, go ahead and ventilate the room where you’re treating the carpet. Also, even though not all molds are toxic and can affect your health, you should still don quality PPE. You can’t ever be too careful.
If you cannot remove or lift the carpet, treat the mold that you can see on the surface. If you can lift the carpet, do so and examine the backside of the contaminated area. Carpet that is contaminated with mold that has penetrated completely and soaked through to the backside should be removed and replaced.
Using a dry scrub brush with stiff bristles, scrub the carpet’s surface to loosen and remove the visible mold spores. Brush the spores into a dustpan and discard them into a receptacle and secure it so that spores will not escape. If you can lift the carpet, scrub the backside of it as well.
Next, thoroughly saturate the product into an area 12 inches outward from the edges of the moldy area. Treating this large area will ensure that you are reaching as many spores as possible. If you can lift the carpet, spray the backside and the subfloor too. Once you have saturated all possible areas, allow the cleaner to soak into the carpet for an hour.
After an hour has passed, come back and blot up any excess cleaner that has not dried into the carpet. You should not rinse the area with water or clean it in any other way than blotting. Any cleaner that is still drying into the carpet will continue working until it is dry. That is, if the product is still drying, then it is still actively working.
Allow the carpet to dry naturally and avoid the temptation to speed up the process by using a fan. Remember that you just loosened up all of those spores before you sprayed the carpet down. A fan blowing onto that area will send any spores that are still standing all over the place. Not good.
To speed up the drying process, you can close the windows and turn up the heat in the house. Place a dehumidifier in the room and let it run for the next 24 hours. Don’t allow foot traffic of any kind (pets, people….not a soul) on the carpet during that time. Mold spores that somehow slipped through the proverbial and literally cracks and weren't treated with the Benefect could still be alive and traffic in the area will spread any remaining spores throughout the house.
After 24 hours, come back and check the carpet. If you see spots of mold that were left behind, you can repeat part of the aforementioned process to treat any remaining contamination.
If another treatment is necessary (there is still discoloration or the area still smells the same degree of musty and mildewy), start at the point where you sprayed your cleaner onto the carpet and work your way through the rest of the process. You’re repeating every step except scrubbing the carpet.
Repeat this process as many times as is necessary. Every subsequent treatment not only removes any remaining mold but also helps prevent any mold problems in the future.
After you have finished the first go-around, be sure to dispose of your brush and other materials or clean them thoroughly. Be sure to seal the garbage bags you place the contaminated items in so that any remaining spores do not escape. How mad would you be if you go through that entire process and wind up spreading spores throughout your home on the very last step? So, please tie up the bag that contains the spores.
Our product recommendation for mold on carpet is...
Benefect Botanical Decon 30
Well, it should come as no surprise that the Benefect Botanical Decon 30 landed on this section's recommendation list. We already told you in the example that it was the best mold control products for the job in the how-to section. Since we kind of spoiled the surprise with this one, we thought it was worth mentioning that the Concrobium Dual Action Mold Control and Stain Remover is also a good choice. You can kill two birds with one stone. Kill any mold that might be hiding in that porous carpet while at the same time taking care of any stains that it might have brought with it.
Mold on Furniture

Well, furniture is made from different materials. Wood. Fabric. Leather. More often than not, you've got a combination of different materials that come together to make one piece. So, let’s address the different ways to clean each.
Mold on Wood Furniture
It goes without saying, but I’ll say it anyway, don the appropriate PPE (N-95 mask, goggles, gloves) and ventilate the contaminated area. Even better, if it’s possible, move the furniture outside. Treating mold outside is much less hazardous to your health than treating it inside.
Now, I realize moving a big, sectional couch isn’t practical, but you can move chairs, end tables, coffee tables, and other smaller items outside. This will kill two birds with one stone. Nature is perfectly ventilated so you won’t have to worry about inhaling noxious fumes or harmful mold spores when you're not actively decontaminating the furniture. Additionally, any mold spores that are disturbed and go airborne won’t be landing in a different area in your home.
If you do move the furniture outside, cut some trash bags along the seam and wrap them around the furniture. This will keep the mold spores contained while you are transporting the furniture outside.
If you’re dealing with light mold contamination, the best and easiest way to combat it is by utilizing the rays of the sun. Mold is like a vampire. It cannot live in sunny conditions. Most wood furniture is stained or painted and these aesthetic touches come with the added benefit of acting as a barrier to mold accessing the porous spaces beneath the wood’s surface. With that in mind, move the furniture outside early in the morning and place it in direct sunlight.
If you're unable to move the furniture outside for whatever reason, don't fret. Be sure that you ventilate the room as much as possible. Fans facing the open windows is an excellent idea because they will draw any mold spores towards them and then force them through its blades and out the window. If you're able to lift the furniture, spread several feet of newspaper out on the floor and place the furniture on top of it so that any mold that falls won't collect on your floor.
You can add a catalyst to this equation by mixing equal parts of distilled white vinegar with water into a spray bottle and give the furniture a light coating of the solution. Using vodka instead of the vinegar solution will produce the same results. Apparently, it’s good for more than just a hangover. Isopropyl alcohol offers the same benefit. That being said, alcohol is only good for cleaning surface molds, it is not effective against fungal spores.
For heavier concentrations of mold that did not dissipate after being sprayed and placed in the sun, you can mix dish soap into a bucket of warm water and scrub the mold down with a soft-bristled brush. Use the brush by scrubbing in a circular motion and wipe with a damp rag whenever you’re finished. If there is no mold left, dry the furniture with a dry rag or towel. For those of you that aren’t able to get your furniture out into the sun, place it as close to the largest window you have in the room and follow the same steps for scrubbing the furniture piece down.
If you find that dish soap was too mild to handle the mold that was left behind after all day in the sun, fill the spray bottle with just vinegar and saturate the remaining mold. Allow the vinegar to sit untouched for an hour, then come back with a damp rag and wipe the mold off. Repeat the process as necessary. In this case, if you’re not going to be able to take the furniture outside, jump directly to putting only vinegar in the spray bottle and saturating the mold. Come back in an hour or so to check on your progress.
For extremely stubborn mold that does not relent after a few repetitions of these steps, you’re probably dealing with mold ingrained in the wood. In this case, treat the furniture like you did your wood floor. Break out the sandpaper and remove the mold. You’ll also have to smooth out the area when you’re finished and repaint or refinish the spot where you were working. Depending on the location of the mold and the age of the furniture, you may wind up having to repaint or refinish the entire piece.
Our product recommendation for mold on wood furniture is...
Mold Off®
Mold Off® is one of those products that wasn't on our big list, but that doesn't mean it's not a wonderful mold removal product. It is pH balanced and biodegradable and is harmless to people and pets. It is effective at killing mold and mildew on a very wide variety of surfaces. The reason that it's the recommendation for wood furniture is that it is designed to be sprayed and left to do its job. It doesn't require any wiping down. Since furniture is a focal point in the home, a hands-off approach will ensure that it doesn't get damaged by a scrub brush. Combine that with the fact that it's non-toxic and safe for people and pets, the mold is gone and everyone that sits down in that spot won’t have to worry about their skin becoming irritated.
Mold on Leather Furniture

What’s good about leather is that it is a quality non-porous material. So you have more options as to what you can use to clean mold from your leather furniture.
The acidic base of filtered or distilled white vinegar works well to treat mold on leather furniture and jackets or pants (if that’s what you’re rocking). It’s acidic enough to break down the mold effectively and mild enough to avoid harming the leather and/or giving it an offensive odor that sticks around for a while.
Once you have got the furniture moved outside, (or, if you cannot move the furniture outside, once you have ventilated the room and spread newspaper on the floor surrounding the furniture) use a soft-bristled nylon brush and sweep all of the visible mold onto the ground. Start at the top of the chair and work your way down, taking time to remove any cushions that are not sewn into the furniture. Once you’ve swept all of the visible mold, run a vacuum hose over the entire surface area of the piece to collect any invisible mold particles. Again, start at the top and work your way down.
We recommend the EC3 Mold Solution Concentrate or Spray. Simply mix the appropriate ratio and or spray from the bottle directly onto a soft cloth and wipe the furniture down.
If you're unable to get ahold of EC3 or other mold control products, mix a solution of equal parts white wine vinegar and distilled water. Dampen a soft, clean rag with the solution and wipe the entire piece of furniture with the rag. Place the furniture in a spot where it will receive unfiltered, direct sunlight throughout the day. This process takes a little while, so double-check the forecast and make sure that you’re cleaning the furniture on a hot and sunny day.
Obviously, if you're inside working, just leave the furniture where it is. Throughout the day, you can come back and check to see if your solution has dried up and if anything has changed. If you were using the vinegar solution, you can add another round to the piece.
If you notice that mold keeps coming back, you’re going to need to come up with a prevention plan that uses harsher chemicals. Move the furniture outside (or ventilate the room extremely well and wear an N-95 mask) and spray with a dye-free 5% ethoxylated alcohol cleaning product like RMR 141 Disinfectant and Cleaner. Wipe the furniture down and spread the 5% solution around to coat all of the leather and allow it to dry thoroughly.
Once you’ve moved the furniture back inside, continue with your preventative measures by placing a dehumidifier in the room with the furniture. Every 3 months, take the furniture outside again to get some much-needed exposure to the sun’s rays. Remember, mold is like a vampire and cannot survive once the sun comes up. For those of you not able to take the furniture outside, just be mindful of the piece and spot-check it every so often to ensure the mold does not return.
Our product recommendation for mold on leather furniture is...
EC3 Mold Solution Concentrate or Spray
The EC3 Mold Solution Concentrate is one of those products that was manufactured to be extremely gentle on any skin that comes in contact with it. Well, to the letter, leather is a skin. So, not only will you have the absolute safest and most effective mold killer that we know of, you'll also be using something that is biologically gentle enough to not damage or discolor the leather.
Mold on Upholstery

Concrobium Mold Control makes an aerosol product that is extremely effective at treating mold on upholstery and other fabric materials. I hate to jump the gun on this one, but the testing was clear on the best product for this job.
Once you have moved the furniture outside (or, if you are unable to move the furniture outside, after you have ventilated the room and spread newspaper around and under the furniture), use a stiff-bristled brush to wipe the mold off the fabric and onto the ground. If you are unable to move the furniture outside, line newspaper up under and around the furniture to collect any mold spores that are wiped off of the surface.
Simply, spray Concrobium Mold Control over the entire area of fabric. As the spray dries, it crushes the existing mold spores and kills any hyphae that may be lurking in the fabric. Once the spray has dried, use a rag dampened with the spray and wipe away any residue that may be left on the furniture. To prevent mold from returning, give the fabric a light coating of the spray and let it be. Concrobium contains no bleach or toxic chemicals, so your furniture is completely safe to be used by your family as it will not harm them if it comes in contact with their skin.
If you’re wondering how exactly Concrobium Mold Control crushes the spores, it’s because the tri-salt polymer penetrates the spore and dries it up from the inside out. It not so much crushes it as it does cause the spore to implode on itself.
Our product recommendation for mold on upholstery is...
Concrobium Mold Control Aerosol Spray
Surprise. The reason this was a no brainer is the aerosol sprays an amount that won't saturate the surface of the furniture and it covers the surface very evenly. Combine that with the fact that you won't have to scrub the Concrobium because it causes the mold spores to dry out and basically collapse in on itself. No scrubbing means no damage to your furniture.
Mold on Clothes, Towels, Bedding, Etc.

There are 3 different ways that you can take care of mold growing on and in the fabrics of the commonly used fabrics and materials found in our clothes, bedding, towels, and the like. One of the 3 methods is the only time that you’ll see the recommendation of bleach in this whole article. In this case, when you use it to treat “the whites”, not only will it take care of the mold but also turn the dingy and dirty whitish fabric back to the pristine snow white that we desire in our clothing.
Treating Mold With Bleach
Gather up your white clothes that have been affected by mold growth. Start the washing machine on a normal to heavy-duty wash setting with HOT water. To be most effective, the water needs to be between 140℉ and 194℉. Below that temperature, mold could survive.
As the water falls onto the white clothes, add your laundry detergent as you normally would.
If your machine has a receptacle dedicated to bleach, add 1 to 1 ½ cups of bleach (depends on the size of your moldy load). If there is no receptacle, just add the bleach into its reservoir or to the water after the machine has filled to its washing depth. When the load finishes, check the laundry to make sure that the mold has been removed. If it has not, do not dry the load. Simply run it again and add a little more bleach than on the previous load. You won’t need to add detergent again. Drying will not remove the mold, it will just set the stain deeper. So, air-dry the clothing in the sunlight to kill any spores that must have been on steroids and somehow made it through all of that. The sunlight will have them heading for the hills.
Treating Mold With Borax
Using Borax on colored fabrics is an effective mold treatment. So, gather up your colors and place them into the washing machine. Set the water temperature on hot and start the cycle.
While the machine is filling with water, dissolve 1 cup of Borax with hot water in a bowl or pot. Once the water is filled in the machine, you can add your Borax solution to the washing machine. Allow the machine to run the wash and rinse cycle as usual. The final rinse cycle should remove the mold from the fabric.
Dry your clothes, towels, bedding, or whatever else it might be on a clothesline. Air drying in the sunlight will ensure that any mold that defied the odds and somehow survived will be killed off. There’s no way that a mold spore made it through all that and never lost its vigor. Sunlight should be the final nail in its proverbial coffin.
Mold on Fabric
Take an old toothbrush to the mold on your clothing and brush as much as you can off of the fabric. Immediately throw the toothbrush away properly by sealing into a zip-lock sandwich bag and placing it into an outdoor trash receptacle. Disposing of the toothbrush in this manner reduces the risk of mold cross-contamination.
Next, apply a stain remover, such as Star Brite Mold and Mildew Stain Remover or IOSSO Mold & Mildew Stain Remover, liberally and saturate the moldy portion of the fabric. Stain removers need about 30 minutes to set into the garment to work effectively. Wash the item by itself in hot water on the large or extra-large load setting. Do not launder anything that you aren’t treating for mold because the spores might survive and contaminate the other articles of clothing.
To hedge your bets, add 1 cup of white vinegar to the washing machine once the water is filled. Vinegar’s mold-killing properties will also remove any mildewy, musty smell that may have accumulated on your garments.
Whenever the cycle has run its course, dry the articles in the sunlight. This should take care of any mold problems you’re having with your clothes.
Mold in Drains

Drains are one of the major mold hot-spots. Mold collects in the vertical pipe called the tailpiece that connects the P-Trap to the drain in the sink. You can keep mold from growing in the tailpiece by regularly pouring a mixture of vinegar and baking soda down the drain. The best way to handle mold contamination in the tailpiece is to physically remove it from under the sink and clean it out with your preferred cleaning solution and a bore brush.
You can use any cleaning agent that you prefer. The drains are non-porous and removing mold from their interior is not complicated. The preventative maintenance with baking soda and vinegar will combat existing mold, prevent it from coming back, and keep the smell wafting up to your nostrils from the drain in check.
A garbage disposal is a different animal altogether when it comes to decontaminating drains. The incessant disposal of food into the drain provides mold with a never-ending supply of nutrients and moisture. So regular preventative maintenance is essential. Fill up the sink with water and plug the drain.
Preventing Mold In A Garbage Disposal
- Mix dish soap into the standing water and circulate it to spread it evenly throughout the sink.
- Turn on the disposal so that the soapy water cleans every piece of the garbage disposal that it runs through and comes into contact with.
- Do this every month.
- Follow this up by slicing up two whole lemons into halves or quarters and run them through the disposal twice a week. The heavy concentration of citric acid does an excellent job in preventing mold from taking hold of the disposal in the future.
Turn the water on slightly before putting the lemons into the disposal. Once you have the water going, you can begin to drop your halved or quartered pieces into the disposal. This is done because water takes the shape of whatever container it’s in and this will help carry the citric acid from the lemon into any potential crevices or hard to reach places within the appliance.
Treating Mold In A Garbage Disposal
If you weren’t on top of your game and mold slipped into your garbage disposal unannounced, you can handle the intruder by following the proceeding steps:
- Fill the garbage disposal up with large ice cubes until they accumulate above the surface.
- Pour 1 cup of kosher salt over the ice
- Start the garbage disposal and pour 1 cup of white vinegar over the ice cubes and into the disposal. At this point, the vinegar solution has been distributed through the disposal system and neutralizes the mold. The kosher salt supplements the disinfection of the disposal while simultaneously sharpening the disposal’s blades.
- Once the vinegar has been poured from its container completely, turn on cold water over the drain.
- (Optional) Have a solution consisting of 1 cup of Borax dissolved in water. Once all of the vinegar has been sent through the drain, pour the Borax solution over any remaining ice.
- Turn on the water once the Borax solution has been depleted. Run the water until all of the remaining ice has been consumed by the disposal.
Mold in Cars

In many ways, mold making itself at home in your car poses a bigger threat to your well-being than mold growing inside your home. Your car is a small enclosed space. So, airborne mold spores floating in the enclosed interior cabin of the vehicle are more concentrated than those floating around inside your home. The greater the concentration of mold spores in the air, the greater your chances of inhaling a larger quantity of them.
There is an array of different substances for mold to land on the inside of an automobile. You’ve got vinyl, glass, an assortment of different fabrics and upholstery, leather, metal, and, in some cars, even wood. So, you’ll have a lot to decontaminate inside of your ride.
As always, wear the appropriate PPE. For major invasions by your fungal foe, your PPE may feel like it’s overkill….I assure you that it’s not. For larger concentrations, you may want to protect yourself from head to toe by wearing what amounts to a cheap HAZMAT suit. Don’t feel bad if you’re a little skeptical about all of that protective gear. You’ll thank me once you’ve got all of the mold removed and you’re still breathing normally. Better safe than sorry.
Moving right along, you’re already at an advantage because your car is always outside (or close to it if you park it inside a garage). Move the vehicle to a spot where it will receive an abundance of direct sunlight and open the doors and crack the windows and sunroof to ventilate the interior of your automobile. Not only will this expose areas in the cab that rarely feel the rays of the sun but also encourage airborne mold spores to exit the vehicle.
Be sure that the forecast in your area does not call for rain. The last thing that you want for a car already battling mold is to have a rain shower soak the interior of the vehicle.
Once you’re set up and ready, inspect the vehicle’s interior and determine where the mold is concentrated. Take the time to look in areas that are often overlooked. Sometimes mold hides in plain sight in places like:
- Underneath the Seats
- Underneath the Floor Mats
- Seatbelts
- Steering Wheel
- Inside the Console and Glovebox
- Gearshift Boot for Manual Transmissions
Mold can vary in color and texture, so don’t get tunnel vision and overlook mold that isn’t black. Typically, mold will grow in a circular pattern, but don’t miss molds that collect in different shapes because you’re only looking for the typical growth pattern.
Once you’ve located all the visible mold, find an old toothbrush and begin brushing away at the contaminated areas. You’ll dislodge mold spores that were loosely clinging to the mycelium.
After dislodging the visible mold spores, find a wet-dry shop vac with a HEPA filter and vacuum the entire cab. Again, with mold you're dealing with moisture so a wet dry vac is the right choice and HEPA filters are capable of catching mold and its spores. whereas a standard vacuum doesn't deal with moisture well even if it has a HEPA filter. If you’re unable to locate a wet/dry shop vac, no need to panic. This step is helpful, but it is not essential to the success of this project. It will just make things a little easier for you.
Next, remove any seat covers, floor mats, children’s car seats, and anything else that can be pulled out of the car without much effort. Now it’s time to pick your poison, literally. Choose your mold cleaning agent and pour it into a clean spray bottle. I recommend using a brand-new spray bottle. The last thing you want is to have some bleach residue lingering in the spray bottle and permanently changing the color of your seats to an awful shade of white.
Here are a few examples of different mold treatments that are effective:
- 4 Parts of Distilled White Vinegar to 1 Part Distilled Warm Water
- 1 Quart of Warm Distilled Water, ½ a Cup of Distilled White Vinegar, ½ a Teaspoon of Tea Tree Oil, and 1 Tablespoon of Baking Soda
- Either of the Benefect Botanical Products
- Concrobium Mold Control
Liberally spray your chosen mold cleaning agent through the entire vehicle. Allow the spray to stand undisturbed for at least 20 minutes so the product has ample time to do its job. Don’t forget to spray the AC vents. Neglecting to take care of the AC vents can turn this entire endeavor into an exercise in futility. If living spores are sitting near these vents, the moment that you crank up the heat or the AC those spores will go flying through the air to every corner of your car’s interior. Then you’ll be right back where you started because the mold has taken over again.
Once enough time has passed, find a wet/dry shop vac and vacuum up every surface that was sprayed.
If you do not have access to a wet/dry shop vac, wait for the surfaces you sprayed with the cleaning agent to dry completely. Once the interior is completely dry, suck up all of the dried mold residues with a standard vacuum. Ideally, your standard vacuum operates with a bag system. Vacuum bag systems collect debris from the floor into a disposable bag that you just toss in the trash. Vacuums that do not use bags must be cleaned and disinfected through the entire machine. Vacuums with bags will only have to disinfect the hose attachments that were used to clean up the mold.
After all of the pieces you removed from your automobile have been decontaminated, send them through your washing machine to ensure that all of the mold particles have been removed. For a cleaning boost, add ½ of a cup of Borax into the washing machine. Hedge your bets by drying these items on a clothesline or by laying them out on the driveway. In the rare chance that some of the mold spores survived, the sun’s rays will seek out the vampirish mold and destroy them once and for all.
If for some reason some of the items cannot be washed in the machine, you can completely soak them in a solution of water and non-iodized salt. Salt will draw out any moisture left in the mold that by now is nearly dead. After the items are saturated, set them out to dry in the sun. Over time, a white crust will form on the surface of the material. Simply brush the crust off with a clean brush or vacuum it up. For those of you unable to remove the pieces from within the automobile, open up the doors and allow the interior of the car to aerate and dry. Even if it’s raining and you have to do it in the garage. Obviously, if it’s raining and you don’t have a garage, you’re probably not out working on your car.
Ensure that any parts of the vacuum that were used to collect mold, treated or not, have been thoroughly cleaned and decontaminated. Otherwise, you’re risking reintroducing mold to the very surface you just cleaned.
If you live in an area where the humidity is bothersome, it’s a good idea to buy a car dehumidifier. Don’t worry, you’re not plugging an electronic device into your car and running down the battery. Instead, this is a small item filled with moisture-absorbing materials.
Similar to silica gel beads or a damper used in closets or bathrooms. It prevents the build-up of condensation on the car’s interior and removes the moisture necessary to cause mold build-up and damage. Placing these vehicle dehumidifiers underneath your seat will ensure that it remains out of sight and still provide sufficient protection.
Our product recommendation for mold in cars is...
EC3 Mold Solution Concentrate or Spray
Your automobile has such a variety of materials and surfaces that mold can grow on. The Mold Solution Concentrate is more than capable of handling mold on any surface that can be thrown at it. It's also completely safe for you and your loved ones (be they people or pets) to jump right back in the car and take off on a road trip without any worries about toxic fumes, skin or eye irritation, or a foul smell. The Mold Solution Concentrate will have you back on the road in no time.
Mold in Air Ducts & HVAC Systems

There are many myths and assumptions made about cleaning your air ducts and vents in your HVAC system. It’s understandable. After all, this system circulates air throughout your home into every room over and over again. This assumption has created a mentality shared amongst homeowners that cleaning your air ducts and vents is a fundamental task in preventing mold growth around your home.
The remediation companies, who could have corrected these misinformed homeowners, have instead fanned the flames of this misinformation and created a monster. So many of these companies will now insist that they come out and regularly check the ducts and vents for mold and mildew build-up. They do nothing more than check the air ducts and vents. And they charge customers an exorbitant amount of money to do this.
Little do these naive homeowners know, but they are paying this company to check a very small part of a very big system. The HVAC system is complex with several moving parts that all function together to one end: to cool and heat your home. Since it is an interconnected system, it stands to reason that if one part of the system needs to be checked then every part should be checked.
The mob mentality and the inherent trust we place in people to be honest and do a good job have blocked out common sense. It’s a simple principle when you think about it. If one area in the system is contaminated with mold, then the whole system is contaminated. Why do I feel that there are a lot of lightbulbs going off above heads right now?
EPA Statement On Regular Cleaning Of Air Ducts
The Environmental Protection Agency (EPA) made the following statement regarding the necessity of cleaning air ducts and vents in your HVAC system and the role they play in the propagation of mold contamination.
"The EPA does not recommend that air ducts be cleaned except on an as-needed basis because of the continuing uncertainty about the benefits of duct cleaning under most circumstances..."
"Duct cleaning has never been shown to actually prevent health problems. Neither do studies conclusively demonstrate that particle (e.g. dust) levels in homes increase because of dirty air ducts. This is because much of the dirt in air ducts adheres to the duct surfaces and does not necessarily enter the living space."
Air Duct Cleaning vs. HVAC Cleaning
However, if you find that your air ducts and vents have become contaminated with mold, there must be something done before things go too far and that little collection of mold infiltrates the entire house through the ventilation system. Don’t just go rogue and start poking around in the vents and ducts. You’ll likely loosen mold spores that want nothing more than to travel and set up shop in another location. And another. And another. See where I’m going with this? The mold will not stop spreading once it has been disturbed and sent on its way until it is either stopped in its tracks or achieves total HVAC domination.
According to the National Air Duct Cleaning Association (NADCA, the premier association for contractors performing HVAC maintenance) does not recommend touching your air ducts and vents unless you have visible proof of contamination. If you notice that your ducts are contaminated, it is a reasonable certainty that the entire HVAC system has been exposed to the contamination and, therefore, must undergo a complete HVAC system cleaning regimen. Signs of contamination in your air ducts includes:
- Strong mildew-like or musty smell throughout the house or at least in a few room
- Nose, throat, and eye irritation when you switch on the air conditioning or walk into a room with air conditioning
- You experience allergic symptoms such as watery eyes and runny nose without an allergic catalyst (pollen, pet hair, etc...)
- Unexplainable headaches that mysteriously disappear when you step outside
- You feel nauseated, fatigued, and/or dizzy, but only when you are at home
- You physically see the mold growing within the intake vents and around the air ducts and drip pans
To make a long story short, the only time that you need to clean the air ducts is when they are contaminated and, if they are contaminated, an entire HVAC cleaning regimen will be required.
What HVAC Cleaning Involves
Cleaning your entire HVAC system doesn’t just mean checking for contamination in the ducts and vents. They are both important tasks, but there is a lot more to do than just that. And the things that need to be done to ensure the overall system is not contaminated and otherwise functioning properly are tasks that the average homeowner cannot perform. This is a skilled trade that requires specific schooling and certification.
Here is a breakdown of everything that must be done if you find mold contamination in or around your air ducts and vents.
Proper HVAC cleaning includes the following detailed tasks:
- HVAC Ducts
- Clean main supply duct and branch distribution ducts
- Clean all return air ducts
- Seal all installation access panels in ducts (as needed for tool access) according to NADCA standards
- Grills and Diffusers
- Remove and visibly clean supply registers and return air grilles
- Furnace Plenums
- Clean furnace supply air plenum and return air plenum
- Furnace Components
- Clean furnace heat exchanger
- Remove, clean, and reinstall blower motor, housing, and assembly
- Check humidifier media and drain pan
- Clean evaporator coil, drain, and pan drain
- Ensure cooling coil is visibly clean and drain pan is clean and draining properly
- Furnace Air Filter
- Replace the air filter or wash the permanent media air filter
Without following these steps, you’re only recirculating contaminated air and sending mold spores flying everywhere in your home. Literally, everywhere. There is not a room in a house with central heat and air that is not affected by the HVAC system.
What’s The Point Of All Of That?
If you’re like most people, a lot of what you just read sounds like a foreign language in your ears. “But I know some of those terms,” you say. Well, I compare that to knowing enough of a foreign language to recognize a word or two in a conversation between two people speaking fluently. You may know a couple of words, but you have no clue what that conversation is really about.
The point is, if you notice some visible mold spores around your air ducts and vents, the odds are that the contamination goes much further than you imagine. And no matter how handy you imagine yourself to be, this is a specialized trade that requires specific knowledge and specific tools to get the job done right.
And, yes, you will have to part with a little coin to get it taken care of correctly. But it could wind up costing yourself a whole lot more money in the long run by wading into the water to try and service your HVAC. It won’t take long to realize that the water is too deep. And you will wind up hurting your wallet even more by feigning expertise after you watched a YouTube video.
Sometimes, it’s best to just leave it to the pros.
What You Can Do
You’re not entirely helpless when it comes to cleaning up mold contamination around your air ducts and vents. These metals are non-porous surfaces and can be treated with the cleaning agents that were outlined at the beginning of this guide. As long as you aren’t unscrewing or cutting or removing any parts or pieces of the HVAC unit, feel free to clean up the visible mold.
Once you’ve cleaned up the mold that you can see, jump on the phone and call a reputable HVAC company to come and clean out your system. Explain in detail what concerns you so they will understand what it is they will be tackling when they come out to your home. Ask if there is anything that you can do until they can get out to your residence to begin the job. Do what they suggest and nothing more. Don’t be a hero.
Besides, the odds are pretty good that the contamination goes a whole lot farther into the HVAC system than just a little mold you can see on the edge of one of the vents. I don’t know about you, but that sort of thing is way above my pay grade.
Hiring A Reputable HVAC Company
Cleaning out your HVAC system is not going to completely break the bank, but the amount of dough that it takes to cover the job is enough that most folks would notice that it’s gone. Depending on the extent of what needs to be done and the cost of living in your area, you can bank on having to spend between $700 and $1200.
Anyone that approaches you and offers to service your HVAC system to the industry standard for 50 whole, American dollars is either hosting a hidden video TV show, has a very serious drug problem, or truly has more money than they know what to do with and got really bored one day. Politely decline the very generous offer and ask for a business card so you can call back if you change your mind. Of course, you’ll never change your mind, but you can warn your neighbors to be on the lookout.
Although, once the cleaning starts, you'll basically leave the professionals to do their work, there are a few things that you can do to ensure the company is set up for success when they enter your home as well as keep you and yours safe.
- Clear a path around or under every vent register and fan in the building. Have the kids clean up their rooms. If this is a commercial job, look for a company that can work around the business hours to disrupt operations as little as possible. If you've also scheduled a dryer vent cleaning, ensure the laundry is done beforehand and the dryer is easily accessible
- Do a walk-through with your technician. Give them a quick tour so they can get the lay of the land and understand where everything involving the HVAC system is located. This will prevent confusion of their end and cut out at surprises on your end whenever you get the bill
- Ask lots of questions. You're paying good money to have this job done and if you're not sure about something, then ask. There is no problem in wanting to clarify exactly what you're paying for
- Decide whether you'll go or stay. Depending on the size of your building, the layout of the ductwork, and the degree of contamination, this process can take anywhere from a couple of hours to an entire day. So plan ahead to either stay to ensure that everything is being done to standard and you're getting your money's worth, or whether you'd like to spend the day with the family on an outing and come home to a house (or office) full of healthier, cleaner air
- Vet the company. Ensure the company you hire is a professional outfit. It's a good idea to ask if they are using the recommended best practices per the National Air Duct Cleaner Association. Ask around. Utilize reviews on websites and, don’t forget, this is your home or business and you're well within your rights to ask for references. You are hiring them, after all
Mold In Electronics

Although the likelihood of mold contamination on electronic devices is somewhat minimal, it does happen from time to time. So, first things first, turn off battery-operated devices and unplug devices that are tethered to an electrical cord. This will reduce the chances of an incidental shock to the system.
Spread paper towels out onto a flat surface and lay the device down on the towels. Again, decontamination is best done outside of the home if possible. If that is not an option, place the paper towels down on a flat, non-porous surface like a bathtub or a sealed concrete floor in the basement. This will reduce any chance that the mold makes its way through the paper towels and into a porous surface. The areas lying between the actual electronic components are oftentimes tougher for cleaning agents to reach.
Use a dry, lint-free microfiber cloth to wipe down all exposed surfaces of the device. Unless the device has been stored in a moisture-rich environment, the mold should come off very easily. If you find that you’re having trouble removing the mold with the dry microfiber, dampen it and try it again.
Follow the initial wipe down by pouring a small amount of rubbing alcohol onto a new, clean microfiber cloth. Rub away all of the remaining mold that you can see on the device.
After you have swabbed the device with the alcohol-laced microfiber, break down the device as far as your knowledge allows. Don’t go crazy, only break the device down as far as you are comfortable. After all, you’re going to have to put it back together once you’re finished with your mold treatment.
After taking the device apart, use a Q-Tip to dry any moisture in the device’s tight spaces. Set the pieces of the device down onto paper towels and place desiccants near the different pieces.
Just a minute, what in the heck is a desiccant?
You’ve probably used a desiccant without even knowing it. Have you ever thrown your phone in a bag of dried rice after it got wet? That’s an organic desiccant. There are also a multitude of commercially available desiccants that can be used in an assortment of environments and utilize different delivery systems. They are designed to pull moisture from an environment. That moisture can come in the form of humidity in the atmosphere or direct contact with water. Both circumstances can be the cause of the mold growth on, and in, your electronic devices.
Arrange the desiccants near the different pieces of the device and let them sit through the night. If this is one of those devices that you use sparingly, don’t put it back together until you need to use it again.
With the device in several pieces, more of the surface area of the device is exposed to the desiccant along with sunlight and oxygen. Water takes on the shape of its container and will go anywhere. Keeping the device in pieces gives the water fewer places to hide. You’d be surprised how effective desiccants are at wicking away moisture out of tight spaces.
Here is a list of the more popular desiccants for absorbing water from direct contact with your electronic devices and humidity from the environments they are held in that do not require electricity or batteries:
Desiccants For Electronics
#1. Wisedry Silica Gel
The Wisedry products come with ten individual 50-gram packs of silica gel. The packs can be placed at strategic points around, near, or touching your device and absorb any moisture from the device and the environment. Once full, pop it in the microwave for a quick recharge and you're good to go. It is given 5 stars on Amazon by several photographers that swear by the Wisedry brand.
#2. Moisture Muncher
These desiccants are shaped like a AA battery and fit into battery-operated devices to absorb any liquids inside the device. Picture this like the Trojan Horse that was sent to the Trojans by the Greeks during the Trojan War as a sign that they were deserting the war effort. Little did the Trojans know that the belly of that horse was filled with Greek warriors waiting for the right moment to strike. Moisture Munchers kind of fit into that vein. Your device cannot tell the difference and just assumes (as much as devices can actually “assume”) that you’ve accidentally given it dead batteries. Instead, the Moisture Muncher uses silica gel as the warriors sent to capture the liquid in your device at all costs.
#3. Uncooked Rice
Always a favorite when time is of the essence. But avoid using rice if trying to revive recently drowned devices though.
Our product recommendation for mold in electronics is...
EC3 Mold Solution Concentrate
If you noticed, on every other recommendation of the EC3 Mold Solution we always recommended the spray or the concentrate. The reason that we are only recommending the concentrate for electronics is because sometimes our electronics are no bigger than our hand and the mold that infests that device is going to be located in an area even smaller than that. With the concentrate, you can mix it with just enough water to handle the mold that you're dealing with without wasting any of your product.
Preventing Mold
Bar none, the best solution for treating mold contamination is one that has not been discussed at all to this point. This method is so simple and effective that mold will never see it coming nor stand a chance. What follows this sentence is a quote that should provide you a big hint as to what I’m referring to…
An ounce of prevention is worth 10 pounds of cure.
See where I’m going with this?
Preventative maintenance is the best way to combat anything. Not just mold. But let’s take a look at the preventative maintenance tasks that you can perform to head mold off at the pass and make sure that it never gets close enough to your home or car or clothes or pipes or furniture. Follow these suggestions and beat mold to the punch.
Be Mindful Of Humidity Levels
If you live in areas where the humidity can become stifling in a hurry, go ahead and purchase a hygrometer to measure the humidity levels. Keep in mind that once the humidity levels go higher than 45%, it’s time to light a proverbial fire under your backside and get rolling with your preventative maintenance tasks because it's that level that mold can begin to grow.
Reduce Humidity With Insulation
Check the insulation on all of your pipes and make sure it’s up to par. Ensure that all of your pipes are wrapped correctly and are not leaking. Especially if you have a basement or root cellar. Those dark, dank places are a veritable paradise for mold to multiply. Correctly wrap any exposed pipes to prevent excess condensation and drips.
You may have to hire a plumber to take care of these tasks. If you’re skilled enough to take care of it yourself, by all means. But there’s no shame in admitting that you’re out of your depth.
Reduce Humidity With Proper Drainage
Proper drainage is essential for keeping the humidity levels tolerable around your home. If you notice water running towards your home’s foundation and puddling up against it, your drainage problem must be addressed immediately. It should direct all water to flow away from the home through the use of proper grading.
If you must, install a French drain or build a dry creek bed for water to flow away from your home. You can keep up the curb appeal of your property by building a rain garden for the creek bed or French drain’s collection point. This may require some professional-grading equipment to properly shape the ground to slope away from your home. Not only will redirecting the water keep the humidity level tolerable, but you’ll also add years to the life of your home’s foundation. Left in standing water, the foundation could shift in the soil and crack.
Be Mindful Of Appliances That Use Water
Washers, dryers, heaters, and air conditioners all have exhaust fans that can collect condensation if not installed correctly. Ensure that all the exhausts are functioning properly and directed away from the home.
Choose Your Flooring Wisely
Carpet and wood flooring can absorb moisture and remain damp for extended periods. This results in mold’s ideal growing conditions, and it will come right in and claim its territory. The moisture that collects will also raise the relative humidity. So, if you’re planning on installing new floors, consider using tile, linoleum, or natural stone. These impermeable surfaces are easier to clean mold from and are less likely to encounter an invasion. Also, if grout is required then you must apply a sealant to it after it is set. Otherwise, it is a porous surface and can cause you bigger problems. Never, never, never put carpet in kitchens or bathrooms.
Use A Dehumidifier
It doesn’t get much more direct than that. A dehumidifier will remove excess moisture from the environment and keep vulnerable areas drier than they would be otherwise. Dehumidifiers work by cooling air in order to remove the moisture from it as colder air is able to hold less water than warmer air. An effective dehumidifier will reduce relative humidity to about 40%. Most dehumidifiers feature wheels that allow them to be placed where needed for mold remediation or other jobs. While dehumidifiers play an important role in mold remediation and control, they do not actually remove mold themselves. They just make the conditions less conducive to mold growth.
Spot Check Problem Areas Regularly
Go around your home and check areas that mold prefers. It’s a good idea to spray a product that creates a barrier that makes it inhospitable to mold growth.
The Concrobium Mold Control and the Benefect Botanical products will both establish an effective barrier to mold growth that will prevent mold for several weeks with each application. So spraying these cleaning agents before the mold shows up sure beats having to spray and clean up mold colonies that have already assumed control of the areas.
Repair Leaks Quickly
Don’t procrastinate whenever you find a leak around your home. The longer you wait to fix it the more time mold has to disperse its spores, set its roots into surfaces, and potentially release its mycotoxins into your humble abode.
Stopping leaks immediately will also prevent water damage. This is especially problematic for walls and ceilings because it will soak the water up and hold it. Water-logged drywall is incredibly structurally unsound and provides the perfect environment for mold to set up its HQ and plan its invasion of your home.
Bottom Line
Keep your home’s hygiene up to par. Don’t leave dirty dishes in the sink. Always pick-up dirty clothes and wet towels after you shower. Use exhaust fans whenever you bathe to send the steam outside. Clean up spilled liquids quickly and thoroughly. Don’t just allow it to soak into the carpet and assume that no one will notice it. They’ll certainly notice it when a big, circular colony of mold shows up on the floor underneath the couch. Make sure that you’re regularly mopping the floors with a disinfectant cleanser.
Mold contamination can take off and spread like a wildfire on bone dry land with high winds. You look up one day and it has spread throughout your house. However, if you just keep your home clean and pick up after yourself and perform some simple tasks to keep mold at bay, you won’t have to worry about a mold invasion.
The mold will take a look at your lines of defense and decide to go after the neighbor’s house. That’s okay, their dog craps on your lawn all the time and they never pick it up. This injustice will not stand.
Wrapping Up
![]()
Whether you’re just beginning your battle with mold or it has been a longtime adversary, I hope you found this guide helpful.
My goal is to offer the kind of help that would have come in handy when I was fighting my own moldy menace - something like this would have made our lives a lot easier back then.
Wishing you all the best with your mold cleaning.
Simon Pearson
simon@moldtcm.com